We purchased a house in June 2022. Most of the house had been updated or was in good shape, but the master bathroom was the original from 1992. This isn’t a bad thing, but bathroom designs have changed a lot since that time. Aesthetically, the bathroom would have been fine. Functionally, I didn’t want to shower in a 2.5′ by 2.5′ shower stall, and the higher standard of vanity height is something I’ve gotten used to. The day we closed, we started gutting the bathroom.
BATHROOM EXPERIENCE
Our first ever renovation project was a bathroom that we gutted, redesigned, and rebuilt in our first home we owned, back in 2013. The house was a foreclosure, and it had been flipped by the bank. The place looked good, but it didn’t last. The bathroom shower tiles were cracking as soon as we moved in. We took walls down and rebuilt them because of mold, we moved the door to allow for a better vanity set up, and we moved the toilet so that you weren’t walking around the vanity to get to it. We had been quoted $25k for a contractor to do it. We spent $4k on materials.

Our last home was a new-build and had an unfinished basement with a bathroom rough-in. We had my dad’s help setting the plumbing, and then we finished it out ourselves. After we did the first bathroom, we said we wouldn’t do vertical tiling again. We really just learned not to use 12×12 tiles on the wall.
The bathroom cost us about $6k to complete. While everyone was being quoted $75k-120k for a finished basement with bathroom, we did almost all the work ourselves (dad’s help on bathroom and setting studs, hired a drywall finisher, and we didn’t lay our own flooring) for about $20k.

We also did a quick bathroom refresh in our current home. The basement bathroom here was forgotten. It hadn’t been cleaned or updated (most of the house had switches and outlets changed to white from yellow, but not this room). For less than $1,000, we laid a new floor, updated the trim, replaced the vanity and toilet, painted, updated the accessories and mirror, and replaced the switches and outlet. We didn’t touch the tub or the faucets in there.

BACKGROUND
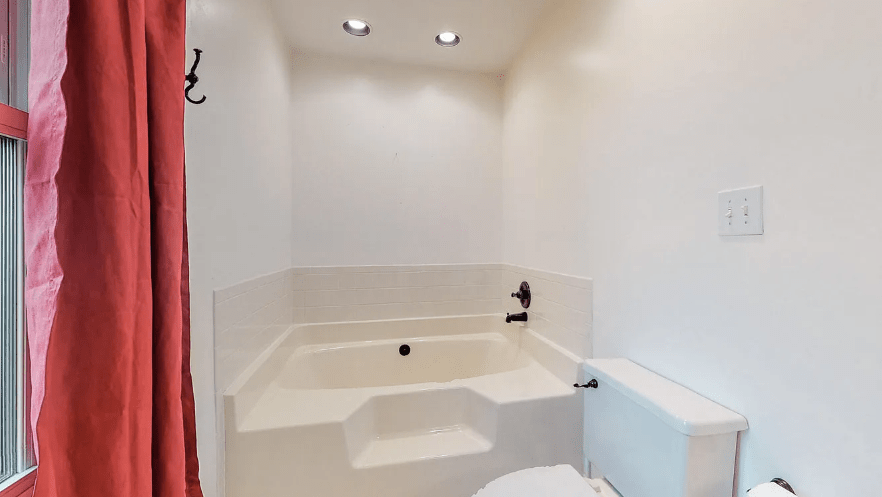
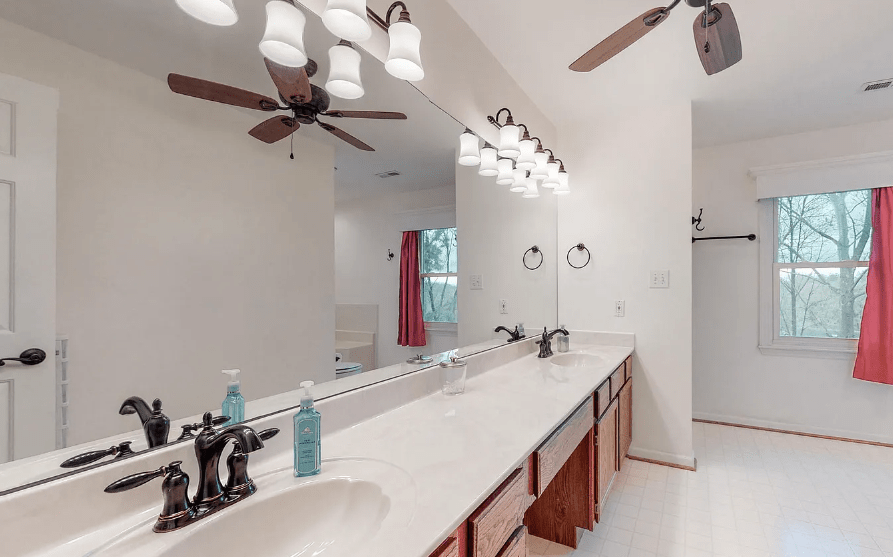
The bathroom was an L-shape. There was a 114″ vanity with a full length wall mirror over that. It also had 2 5-light wall mounted light fixtures over each sink (excessive!). Then the shower was your typical plastic molded shower stall with a frosted glass door. It was 2.5′ x 2.5′. Around the L was the toilet (awkward positioning, really), and beyond that was the soaking tub with built-in molded steps. Oh, and there was a ceiling fan over the vanity.
THE PLAN
We needed to take everything out so we could see our options. We gutted the bathroom pretty quickly, but we dragged our feet on the rebuild. It worked out in my favor though; I’ll come back to that.
The L-shape encompasses the master bedroom’s closet. It’s a walk-in closet, but it’s not spectacular. We tried to make a plan where we knocked down the closet walls and reconfigured the whole space, but the window placement hindered us, along with some of the desired sizes of fixtures. Once we gave up on incorporating the closet space, it was clear we just wanted to make the shower more functional.
As we started laying blue tape to map out the size of the shower, we realized we were hindered by the closet walls. If we made it too big, we lost the ability to walk around the L-shape comfortably. The whole point here was that we wanted a bigger shower. We settled on as wide as we could make it, while still being able to fit around the corner (generally looking at 3′ wide, which is standard hallway width).
At the beginning, I mentioned that I wanted to washer and dryer moved from the garage entry. Mr. ODA said we’d do it “later.” But the walls were opened now… so why not now? He came around. We hired an electrician to move the dryer electric from the room off the garage, directly above it to our bedroom, and then up into the attic to move over and come down into the bathroom. That meant the width of the shower was now maxed at how wide our washer/dryer was to get through the hole.
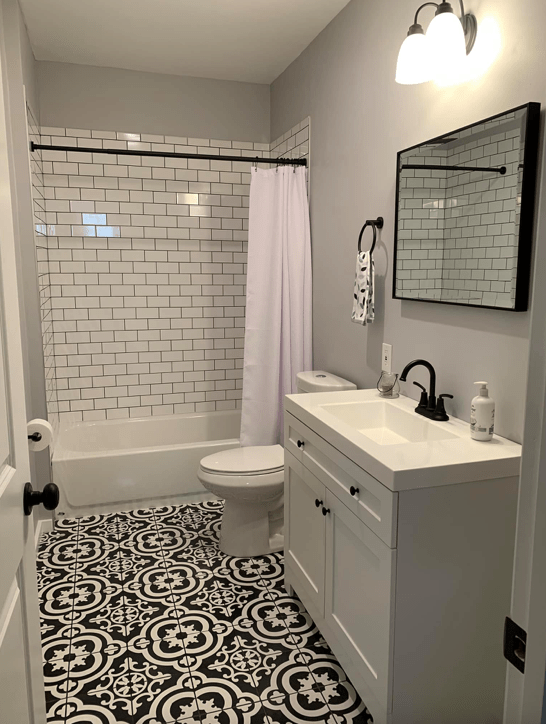
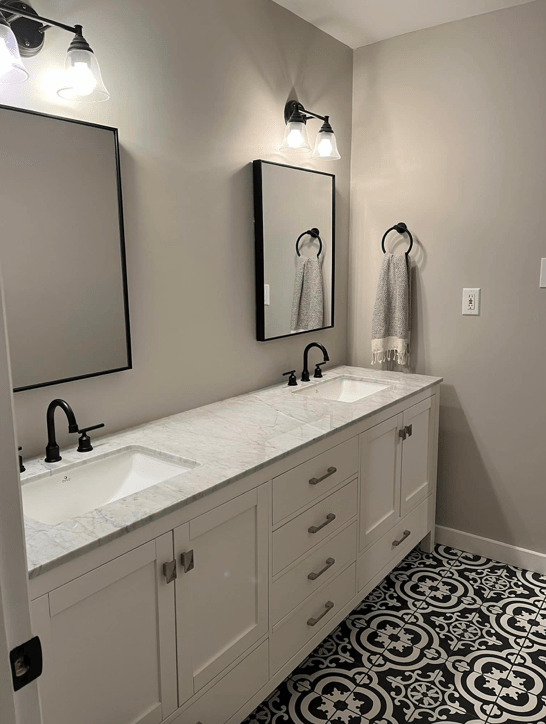
We bought a waterproofing system to build the shower any size we wanted (versus a shower pan), and we ended up about 3.5′ x 5′. We dropped the vanity section to 7′, and dropped our lighting to 2 2-light fixtures. 🙂

We eventually will add glass to the shower area (there’s a curtain there for now). The master bathroom is the most infrequently cleaned area of my house (and I clean a lot!), so maintaining a glass shower enclosure that’s used daily is just not high on my priority list. Mr. ODA had built a shower bench for our last house’s shower, and by some miracle, it fit perfectly in this newly built shower. We also reused the floor tile option because we wanted a statement in here, but we were too scared to commit to a pattern and it not look right; we knew what this pattern looked like, so we kept it.
The plumbing for the washer and dryer was a concern. We were able to use the old tub’s drain to be the washer drain. We were also able to use the supply lines. However, since the supply lines were on an interior wall, and we were nervous about moving them to an exterior wall (so it would be behind the washing machine), we kept them there. The width of the room didn’t allow for clearance for the supply lines to be hidden down further, so the lines fall across the top of the washer. While not aesthetically great, everything else about this is so much more functional and makes me happy.
MUD ROOM
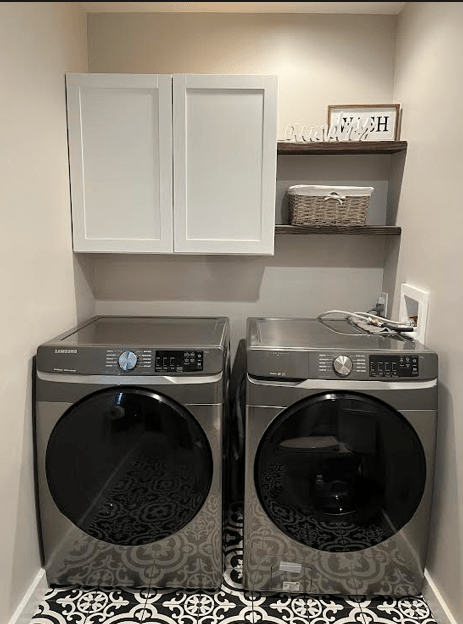
The washer and dryer moving to where the tub was in the master bathroom meant we could create a mud room. This was a really big deal to me. We park in the garage. Our garage door is basically always open and this is how people come and go. I wanted a functional space that wasn’t cramped by a washer and dryer that you were walking around.
Additionally, the previous owner had changed the closet function to be 2 shelves. There was no hanging room for coats, and there was no storage for mops or vacuums on the first floor. We moved the middle-of-the-closet shelf to be a higher shelf, added the dowel so we could hang coats, and cut the bottom shelf in half to still allow for some storage options, but also allow for vacuum storage.
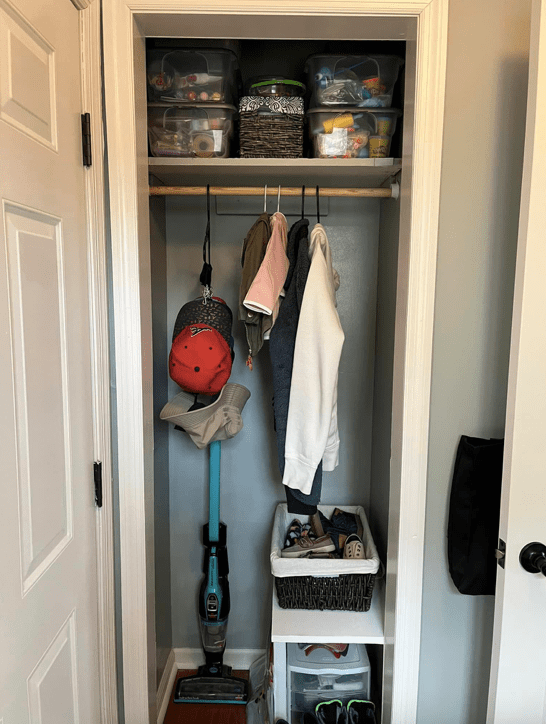

We’ve since added shelving over mini fridge, and there are bins for shoes in the cubbies. In our last house, we had a bar area in the basement where this fridge was. We had originally planned for it to be in the basement in our current house also, but we don’t spend as much time as we thought down there. It was a perfect fit to include it in the mud room and build the bench to incorporate it.
By moving the washer and dryer from this room (for our own labor and about $400 worth of an electrician), we made our house significantly more functional. As I grow older (and move an absurd amount of times), I’ve learned how much more important it is for my house to function.
SUMMARY
A quick facelift to a bathroom is a pretty easy project. Moving plumbing, electric, and walls creates a few more levels of difficulty. However, it’s not impossible. We’ve learned over the years that if we act as our own general contractor (hiring out piecemeal), we can save a lot of money. In this post-covid-world, contractor costs are high. If we hired out this entire bathroom, I don’t doubt that we could have been looking at $45-50k with all the things that were to be moved. Instead, it cost us about $5,000 worth of materials and our time.
Our time was definitely at a premium. We dragged our feet on decision making, while focusing on other areas of the house. The kids’ bathroom is directly outside our bedroom, so it wasn’t a hassle for us nor was there an immediate need for us to be back in our own bathroom. We got the floor tile down as fast as we could before we officially moved in, since our washer and dryer would need to be placed. That lit the fire for our toilet and vanity to be installed too. But the shower was a different story. We got it framed out, but didn’t start laying tile and grouting until after our 3rd was born. I thought I would feel better doing that work once I wasn’t pregnant anymore, but I didn’t factor in the baby needing to be help all day long, so that created quite a challenge. But we did it.
We gutted the bathroom in mid-June, and we had it completed done (well, except for the shower glass that I just don’t even want) by Christmas. While we took our time doing it, the best parts are how much more functional and comfortable the house is, and how it cost us about 10% of what it would have been if we hired it out.