I took a break from writing posts to play in the nice weather we were having and then finish up some outstanding projects this weekend. Some projects are still not finished, but I felt good about the progress. Here are some things I did, which means you can do it too and save yourself some money. 🙂
SHOE STORAGE: $6
We have a mud room “welcome center” or “drop zone” in our house. Here’s a picture from the builder on what it looks like.
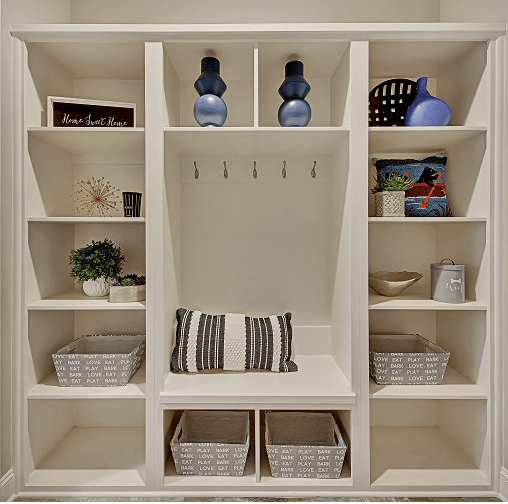
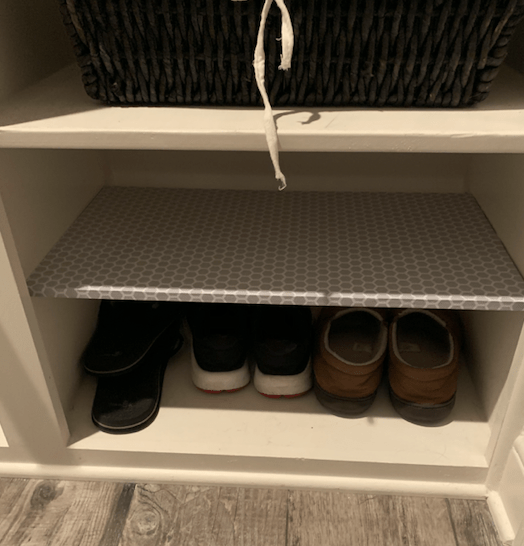
It’s beautiful until you realize that the purpose of these shelves is to house things like shoes, keys, outdoor things, etc. There’s no point to style them like bookshelves, and it’s hard to keep it looking organized. When we have guests, they have to see this because it’s outside the only first floor bathroom. It drives me crazy that people see it. I store all our craft supplies on the top shelves (little hands), and I ripped all that down and organized it into bins. It’s not pretty to look at, but it’s still better than the pile of things that quickly gets unorganized. The bottom shelves have shoes on them. A year ago, I asked Mr. ODA to build me an intermediate shelf in the bottom right cubby. We used scrap wood already on hand at that time. Shoes aren’t tall, and we were just throwing them in there on top of each other. Well, all this build up just to say: I finally bought contact paper and wrapped the plywood. I originally wasn’t going to bother painting it because I didn’t have the trim paint on hand. Since then, a nice worker left me a pint of it, but I still thought the contact paper would be better. It seems so small and silly, but I got the pattern to line up straight when I wrapped it on the edge, which makes me happy.
LAUNDRY ROOM: $49
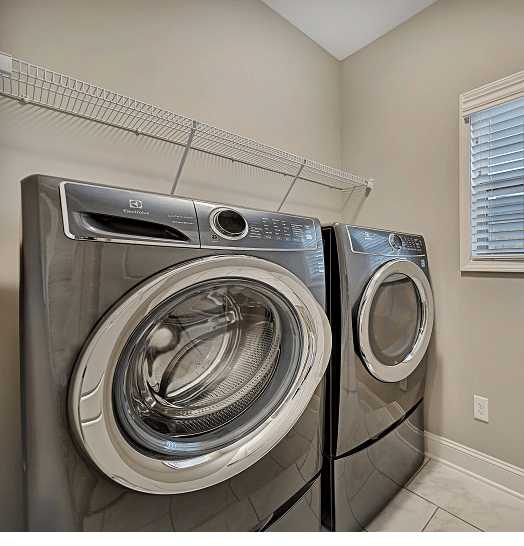
Again, nearly a year ago, I took down the builder-grade wire shelf that was in the laundry room. I then patched the gigantic holes that this type of shelf requires. Here’s a builder photo of a laundry room in this floor plan to show what I mean, and where it started.
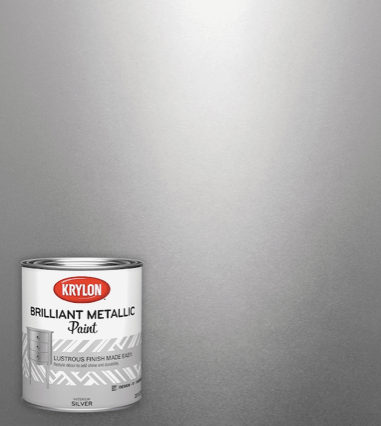
Instead of blinds in there, I frosted the bottom sash of the window with spray paint I had left over from doing a similar job in our last house ($0). Someone was getting rid of a cabinet on our neighborhood page, and I wanted it for the laundry room ($0). I bought cabinet enamel ($25), which I highly recommend over regular paint if you want a clean look. It’s pricey, but it’s worth it (I’ve used it here and on a desk I refinished, and I still have half the quart left. Here’s the one I used.

I hung this repainted cabinet last summer. Every time I walked by, I thought that a light brick wall would look so good with the color of the cabinet. I thought about it for several months and finally decided to go for it. I bought 2 rolls of peel and stick wallpaper off Amazon ($14). It did not go well. I got the idea out of my system, but I didn’t enjoy the process of hanging it. I’m curious about doing traditional wallpaper, which is easier to move around and line up, but I was disappointed that these two sheets didn’t automatically line up with each other and I had to piece them together.
In my last house, I hung a cabinet and then Mr. ODA and his brother built two shelves that I stained dark next to it. That’s still my goal here, but I haven’t done the shelves. I had already been in Home Depot for an hour, and Mr. ODA wasn’t there to talk me through the options, and HD likes to just throw all their crap in the lumber aisles to make it very difficult to navigate if you have a cart, so I gave up. But I did get chair rail ($10)! I originally wanted something really big, but I panicked and went with a smaller, more ornate option. I stained it espresso (already on hand from the last laundry room job), so you can’t really see the details in it, but at least the end of the wallpaper is covered now. It doesn’t matter how many times I am around an air compressor and nail gun; I do not enjoy that thing.
I also put the contact paper that I bought for the shoe shelf on the bottom shelf of the cabinet I refinished since paint had dripped into it and the original owner of it had drilled several holes through the bottom of it. P.S. The knobs were put on by the previous owner; one day I’ll patch the hole and realign the knobs so they’re even, ugh.

STENCILED WALL: $73
I don’t really recommend stenciling a whole wall. I’ll probably put 10 hours into the wall already by the time I’m done. Also, $73 is a lot to spend on one wall, but I’ll find more uses for the paint. That’s the upfront cost, but with leftover supplies, there will be more projects.
I wanted my daughter to have pink in her room, but nothing bright. I found this beautiful muted pink color. I wanted to do one wall this color in a satin finish, and then get the same color but in an eggshell or flat to do the stencil. While at the store, I found a different kind of paint and went for that instead; it’s a metallic paint! It’s subtle enough that it’s hard to capture all the stenciling in photographs, and it changes how you see it based on how the light hits it.
So I’ve purchased a gallon of pink paint (that has more than 2/3 left in it) ($38), this special paint (with about half of it left once I’m done) ($20), and the stencil that I had someone make for me ($15).
Halfway through the wall, I discovered an error I’d been making. I had been using a manual level to make sure the top of the stencil was level when I put it on the wall. The stencil was not cut correctly – the image on the stencil is cockeyed within the stencil, so leveling the edge of the stencil meant that everything I was painting wasn’t straight. Once I started using the laser level, I found that the level line wasn’t the same whether I used the top of the cut out part or the edge of the stencil piece. I tried to start correcting it because, while it wasn’t noticeable, I figured it’d get noticeable by the time I got to the other edge of the wall and along the ceiling. Things got messed up in a few spots where I couldn’t quite see where I was lining it up against what I had already painted.
Oh, and let’s not forget that I had the paint out, went to deal with a crisis with my son (potty training!), and my daughter seized the opportunity. She got my paint brush, dipped it in the paint, and smeared it all over the stenciled wall I had already done. Luckily, that stencil was dry, and I found her right away so the paint was wet, so it mostly just wiped off.
There are two sections I’ll need to re-paint pink and then re-stencil, and then there’s a few touch up areas where I’ll need to hit it with a small brush and fix the pink around the stencil. Once paint got caked on the stencil and created its own barrier to bleeding behind the stencil, the wall is coming out perfect. If this didn’t take absolutely forever, I’d want to go back and do the first 5 rows I did without the laser level and caked up stencil, but no thanks.. it isn’t THAT noticeable!
The [near] finished project is exactly how I pictured it, which never seems to happen for me, so I’m powering through. Here’s a close up of the wall since there are too many imperfections to share the whole thing at this point.

BASEMENT WET BAR: $53
Mr. ODA and I put up shiplap against the wet bar wall as a feature. We didn’t want to close in the room with upper cabinets (this section sits in the middle of the open basement and we didn’t want to distract from that), we didn’t want to tile the wall with a backsplash because the wall is FAR from even, and we didn’t want to leave it painted with nothing above it. Mr. ODA decided on shiplap, and he liked the charcoal color instead of the white or painting it. It really looks great, but it’s unfinished. We didn’t know how we wanted to do the final piece. So this weekend, I bought two molding types to check it out, and we still need to add that and paint/stain it. I also purchased the sink faucet finally, which should arrive tomorrow. We first thought we’d put shelves in the shiplap, but after you work so hard to make it level and shim it like crazy behind each piece, you don’t really want to immediately drill anything into the face of your pretty project. 🙂 I didn’t include the cost of the shiplap in my calculation above because that was purchased before this weekend’s goals of finishing projects, but the molding was $10 and the faucet was $43.
Speaking of finishing, this reminded me that I have to buy the cabinet pulls. We had held off installing them because the flooring people were going to come back and fix some things. There’s a protective layer on the outside of the cabinets, and I didn’t want to pull it off until they were done banging around near them (their workmanship was quite poor, so I don’t trust them). Since I wasn’t going to install them, I didn’t make it a priority to order them, but I can now. There’s more to come on the basement, since we did most of it ourselves.

DIMMER SWITCH: $11
Our son’s sleep has been an issue since birth (PSA: Buy the Taking Cara Babies course for newborns and save yourself a lot of frustration in life by getting a baby to sleep longer with less fights). We finally got into a bed time groove, but it involves him sleeping with the light on. It drove me crazy that it was so bright in there, so I removed the bulb from the overhead light and told him it was broken so he’d use the lamp. When we visited my family, he slept in a room with a dimmer switch and let the light be on the lowest dim level. I finally got around to purchasing the dimmer switch and installing it! Cut off the electric to the room at the electrical box, unscrew the old one, cut the wires, strip them to the right length (it’s on the back of the switch), insert the wires in the right places, screw it into the wall, and turn the electric back on.
SUMMARY
And that’s where I’ve been for the last week! We ordered a desk for the office and a dining room table now that all the existing furniture is where it’s meant to be with the basement finished. That’s what caused my final push to get things done. Now we have our daughter’s birthday party coming in a few weeks, and I was hoping to have almost everything completely before people are in the house! Now go do some projects you’ve been putting off too. 🙂

One thought on “DIY Projects”