We had a tenant abandon a property, and he left it a mess. There was some furniture and garbage left behind. I’d love to know what tenants do that destroys the walls in less than two years. I’d say the dog never went outside based on the carpet stains, but there was a giant pile of grocery bags fulled with poop outside the back door. We hired a carpet cleaner that was available the fastest, and that was a mistake. They basically just came and put lines in the carpet. I was not happy. Not only was their effort the absolute minimum of the task on hand, we had asked for it to be “rotovacced,” and it clearly wasn’t.


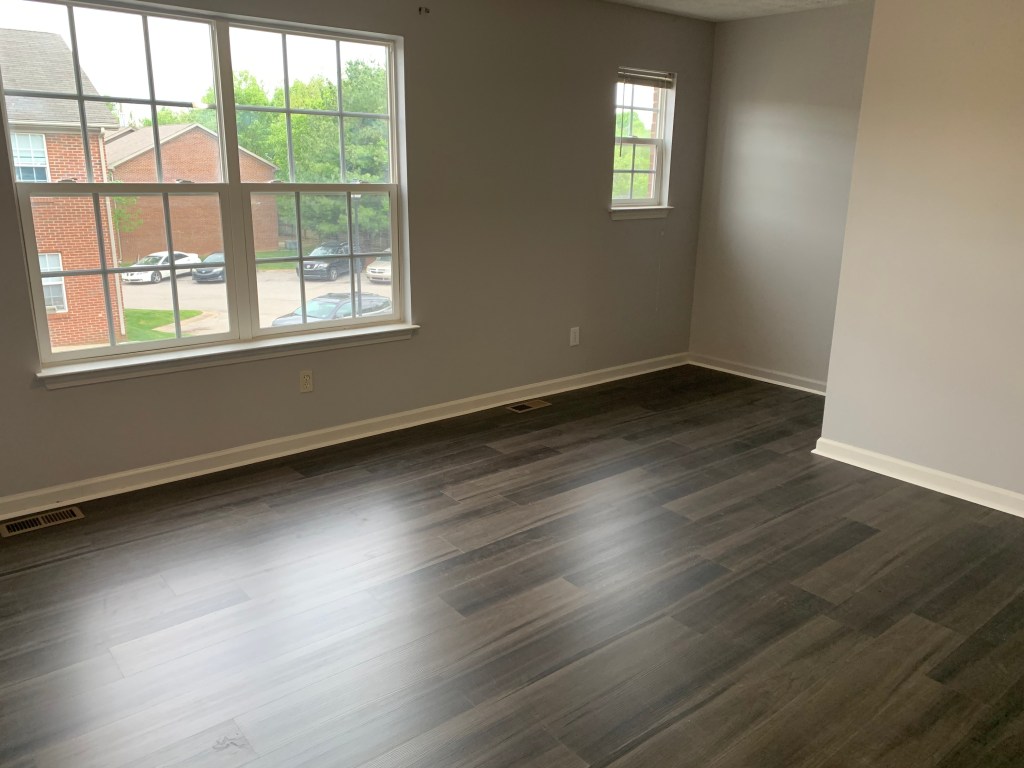
Recently, we received an updated assessment from the county, which included the comps they used. We bought the house for about 86k. The comps range from 110k to 130k. The comps at the high end had no carpet and upgraded fixtures. The low end had all original things. Looking to resale value, I wanted to lay Luxury Vinyl Planks (LVP) in the living area instead of replacing the carpet. Since we were nearly a month into unexpected lost revenue, the goal was just to address the main living area that would catch your eye.
WHAT IS LVP?
LVP is vinyl flooring made up of planks instead of being one sheet. It’s a floating floor, which means you don’t glue it or nail it down to the subfloor (e.g., plywood). The boards “click” together. When you get the connection right, the board lays flat on the subfloor.
Ironically, it was hitting the market around 2015/2016, and I declined it in the house we were building. I didn’t realize that it was going to be the “go to” flooring by 2020, and that it would be in our new construction house we bought then.
INSTALLATION TIPS
First, we had to remove the tack strips and staples from the subfloor after the carpet was removed. The floor needs to be mostly level. There was one spot where two pieces of plywood were not level, and it did cause issues with keeping the pieces connected.
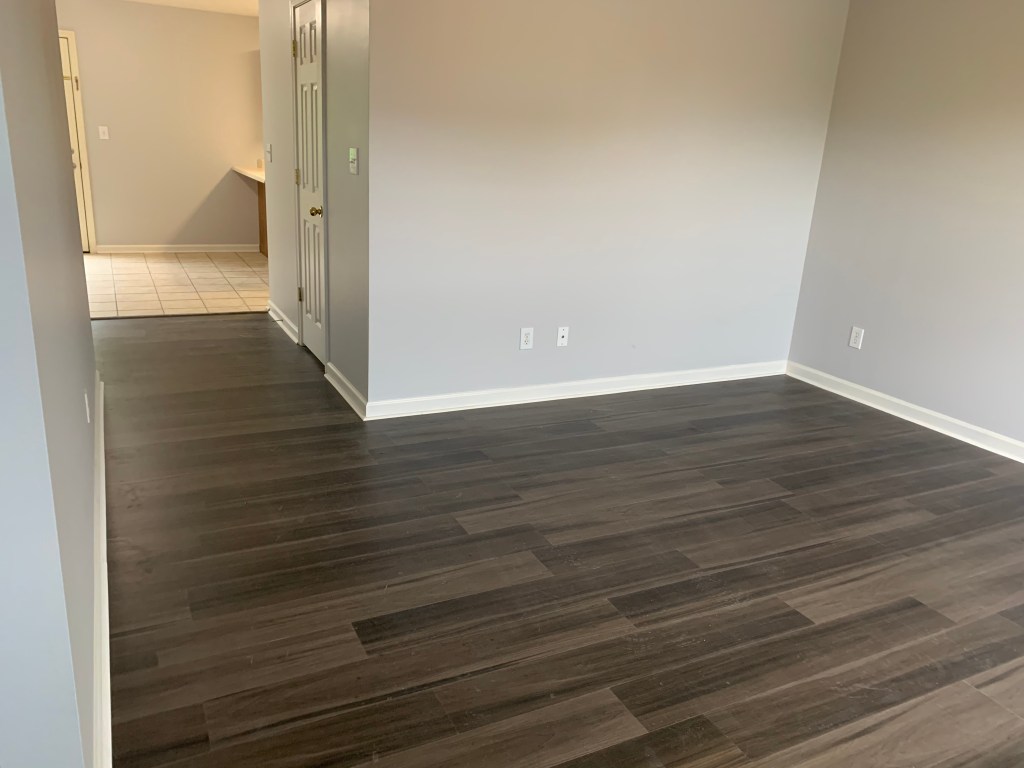
Start in a left-most corner of the room, on the longest wall. Our living room is nearly square (13×13.5). The deciding factor on which way to lay the floor was to eliminate cuts against a schluter edge where there’s tile in the kitchen and dining room. When you enter the house, you walk up a flight of stairs, and you see the tile edge right away. Since this was our first time installing flooring, we wanted that edge to look good. The best way to do that was to not put any cut edges against it, but to lay the planks parallel to it.
Stagger the boards and create a random pattern. You don’t want to see a pattern in the flooring (e.g., don’t lay a full board, then a half board, then a full board, to start the rows). You also want to open 3-5 boxes at a time and mix up the boards. Different boxes may have different variations in the coloring, and you don’t want a splotch of a lighter shade of flooring in one section, so it’s best to mix up the boxes.
You’ll have waste. When you plug quantities into Home Depot or Lowes, they typically ask if you want to add 10% for waste. We calculated needing 9-10 boxes, and we opened 12, with 3 full boards left. There was a mishap with one of the boxes, but that probably lost us 4-5 planks, so I think we still would have opened 12 boxes.
Lay the short edge together first. The second board lays under the connection of the first board that’s already on the floor. When you connect the long edge to the board above it, just wiggle it until it lays down flat and you see no seam. Sometimes you need to use a tapping block to get it to fit together better, but when you get the right connection, it’ll literally just fall in place.
To cut a piece to fit at the end of a row, use a utility blade along a straight edge. When you go to snap the board, hold the straight edge in place. Both Mr. ODA and I tried snapping a board without the straight edge, and the board snapped in a different place.
When needing to cut the entire length fo the board, use a circular saw or table saw. It won’t be easy to score and snap because of having less leverage. To cut small areas within a board, such as floor vents, you can use a jig saw. Cutting the board with the circular saw makes a gigantic mess. Think of it like packing material that just explodes on you. However, there is a benefit that it’s not the clingy type of material, and it does sweep up easily.
At the end of each row, cut the board about a quarter inch too short. You’ll need to fit a tool into the crevice to pull it into place. I had been cutting it to fit under the baseboards, but then you can’t get the boards connected. At the end, you add shoe molding or quarter round to cover the cuts.
COST & TIME
The flooring, shoe molding, threshold to cover the carpet to floor transition, and an installation kit cost us about $700. We picked LVP because it comes with a cork type material attached to the back of each plank, and it doesn’t require underlayment.
We picked the LVP instead of getting new carpeting because of resale and because of the cost and time associated with carpet installation. At Home Depot, if you pick in stock carpet, it’s not subject to the free install. If you spend $499 otherwise, you get free installation. We would pick a carpet that is about $1/sf, so we wouldn’t get to the $499 price for free installation.
We arrived at the property at 10:30 am. We had to remove the tack strips and staples. Mr. ODA removed all the tack strips, and I started on the staples. When I got an area clean, he started laying the planks while I kept working on the staples and sweeping. At 2 pm, I will still working on staple removal, and he took a break for a work meeting. I took over laying the boards. We finished laying the floor, installing the quarter round, and caulking the seam between the baseboard and quarter round at 6:10 pm.
There was a big learning curve on how to get the boards to click together most effectively. We could have probably eliminated an hour of work where we were trying to figure things out rather than laying the floor. I also had a big speed bump trying to get the piece at the bottom of the stairs in place (a lot of cuts and having to figure out leveling the board since it couldn’t be butted up against the bottom of the step, which wasn’t level), which was probably a 25 minute delay. With that said, my back was killing me. It’s probably a project that’s better suited to be split over multiple days as a newbie, rather than powering through 8 hours of work.
I asked Mr. ODA if he would do it again (as we both complained about how much our bodies hurt), and he said yes! We just wouldn’t be in such a rush to finish one room in one day in the future, even if it was only about 200 sf.