Building off of my last post about tenant abandonment, here’s what it took to turn over that unit. We rarely have units to turn over in our portfolio. Last year we had 1. This year we expected to have 1, but this abandonment made it 2. To have continued renewals over 13 properties is a blessing.
Usually, we need to clean and paint. Every once in a while, we have more work to do, but it’s rarely a massive undertaking. This one was a massive undertaking.
Our property manager walked through the house and saw that junk was left behind and it was filthy. There should be another word worse than filthy. I’m always surprised at how much damage someone can do to a place they have to eat and sleep in for two years.
This is a 3-story townhouse. The entry level is the garage and a den-type room; then there is a flight of stairs to the main living area of a kitchen, dining area, powder room, and living room; finally, there’s a flight of stairs to two nearly-identical bedrooms, each with their own bathroom. The two masters concept and a garage are benefits, but the two flights of stairs is a downside.
TURNOVER ACTIONS
The property manager had her maintenance staff remove everything left behind. I thought she was going to hire something like Junk Luggers, so I was pleased to see that this cost us less by her using in-house staff. They wiped down the baseboards, but didn’t clean. I was under the impression that it was going to be cleaned before I got there. I was also under the impression that the carpets were going to be cleaned on the 25th.
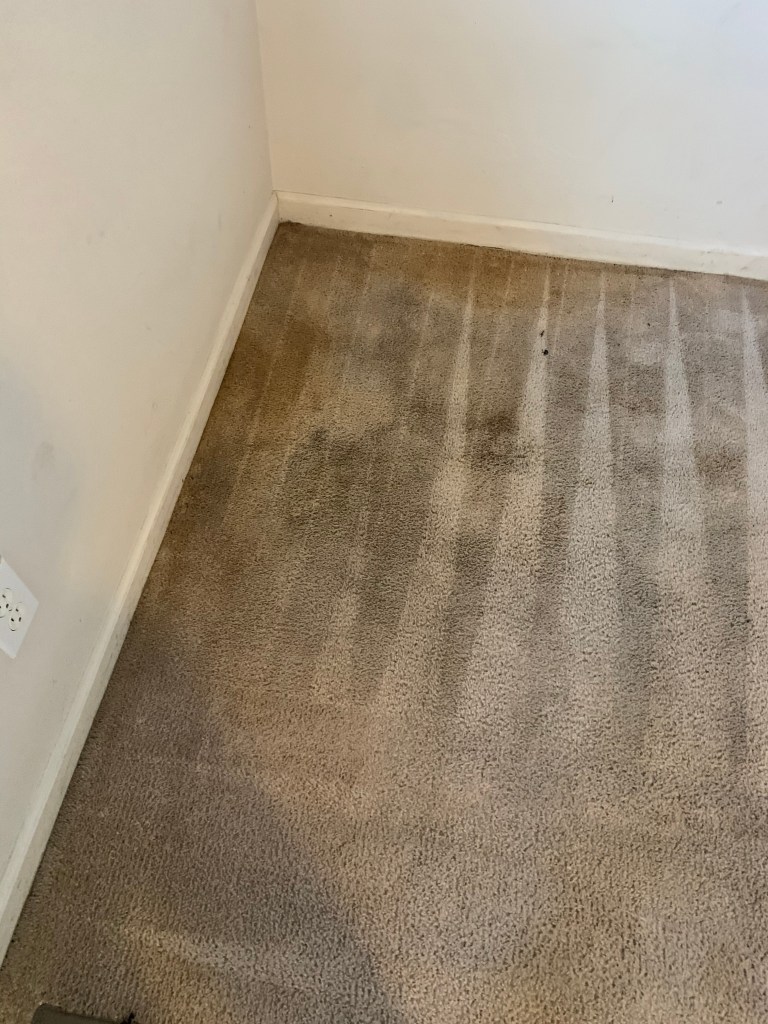
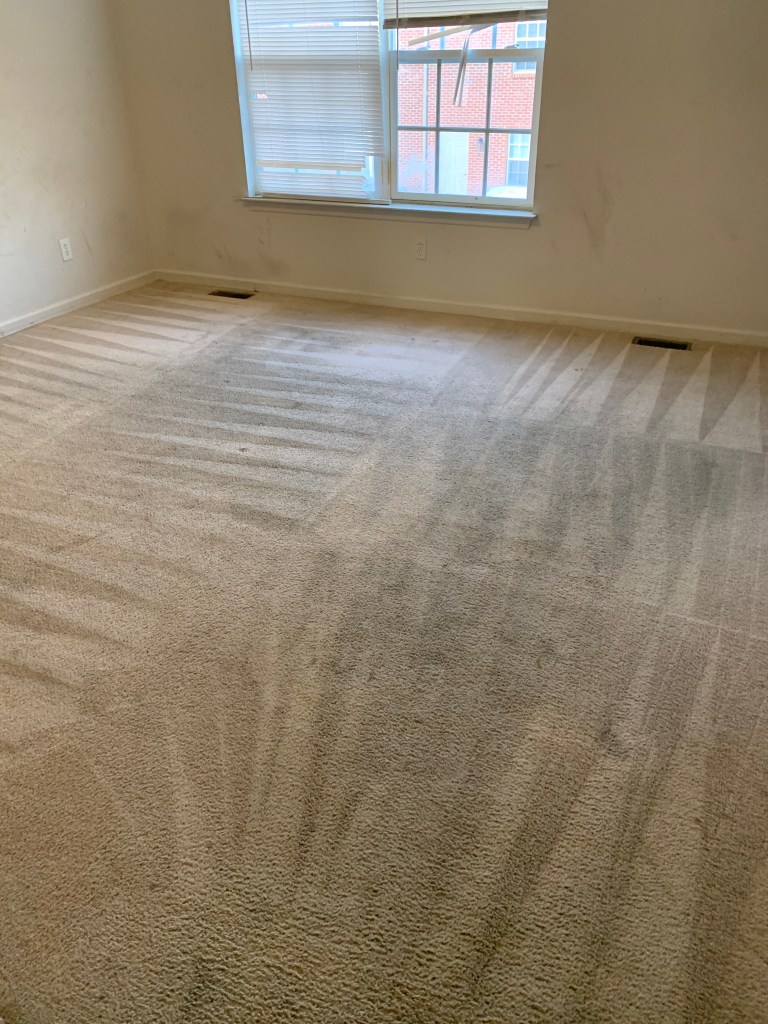
I was working weekends at the time, so I couldn’t get to the house until the 27th. I didn’t find the need to rush down there because I thought my property manager had action happening. Plus, I’m pregnant, so I didn’t want to be in someone else’s filth for extended periods of time, and I expected it cleaned up before I was scooting along the floors and in tight spaces. Well, I walked in and was so upset. The carpet was disgusting. It looked like someone made lines in the carpet with the steamer tool, but didn’t actually clean anything. Not a single thing was actually cleaned. The kitchen and bathrooms were horrendous. I’ll spare you pictures of what the bathrooms looked like. You can see “steamer” lines in the carpet, as someone had been there, but there was zero effort put into actually cleaning the stains.
I called the property manager, and she agreed to come meet me at the house. She agreed that the carpet cleaning was unacceptable, and I wouldn’t be charged for that. She explained that her guy didn’t have time to clean the place except for wiping baseboards, and they had decided to clean it once at the end. I said that would be fine if the house wasn’t this bad, but there should have been an initial cleaning. She showed me pictures, and even though the baseboards were gross, they had actually been wiped down because they had been even worse.
The property manager called her typically cleaner, and he agreed to get there the next morning. I showed up the next morning to find he was still there working. He said the house was in much worse condition than he was told, and they’d have to leave to go to another job and come back to this house. I wasn’t surprised, but I was very happy to see that everything was cleaned, and that I wasn’t completed grossed out by being there.
DECISION MAKING FOR TURNOVER WORK
There are costs that you just have to deal with in the turnover – junk removal, cleaning, carpet cleaning. Then there are costs that you don’t expect to be on your radar, but are necessary – replace broken floor vents, replace missing outlet covers. Then there are decisions that require more thought. For instance, we haven’t enjoyed this property in our portfolio, and we’re considering selling it. We’d like to recoup some of the costs we’re having to put into it now, but selling it is on our radar for the future. So do we want to clean the carpet, or start replacing the carpet with hard surface flooring to increase our property value for a future sale?
We recently received an updated assessment for our taxes on this property. I happened to look up their comps given. We bought this house for $86k. I noticed that the houses with no updates to it were selling around $110k, while houses with nicer flooring and fixtures were selling up to $130k. My goal was to start preparing for a sale in the future, and we’d have a few steps done instead of having to redo the entire house in a year or so.
The biggest actions I took while looking into the future were:
1) I painted the main floor baseboards white. The baseboards, walls, trim, and doors were originally all painted the same color – an off-white or beige. Over time, we kept the trend going because it made it easier and quicker to turn over the house. While I didn’t paint all the baseboards white, I did it in the main living area and in the stairwells. I painted the interior doors of the main living area (main entry door at the top of the stairs, the laundry room door, and the powder room door) and all their trim white.
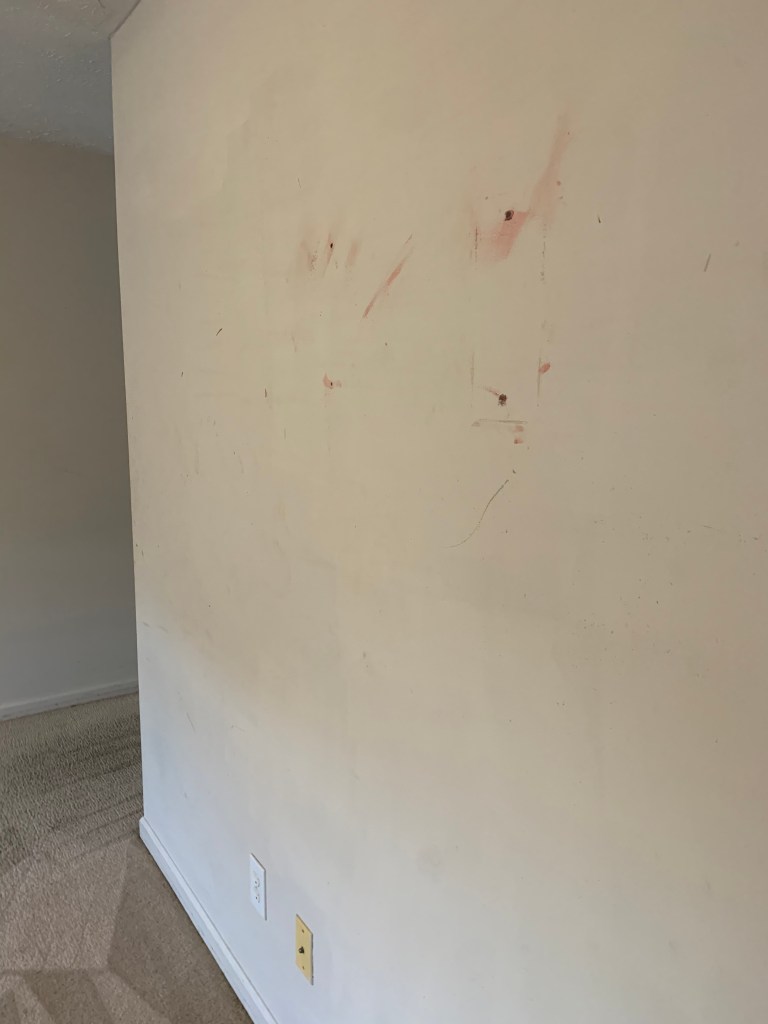
2) Repaint all the main walls. At the last turnover, Mr. ODA went into the house and touched up the walls. The paint had gone bad, so the touch ups were very noticeable. I painted everything except one bathroom, half the laundry room, the powder room, and the two bedroom closets. Every other wall surface (including two stairwells…gosh) got painted a gray.
3) We did get a carpet cleaning company to come out and rotovac, which is an incredible process that brings a carpet in rough condition almost completely back to new. It’s truly impressive. They also charged us $159 for this more intense process, while the original company that just made lines in the carpet was going to charge $244 for nothing.
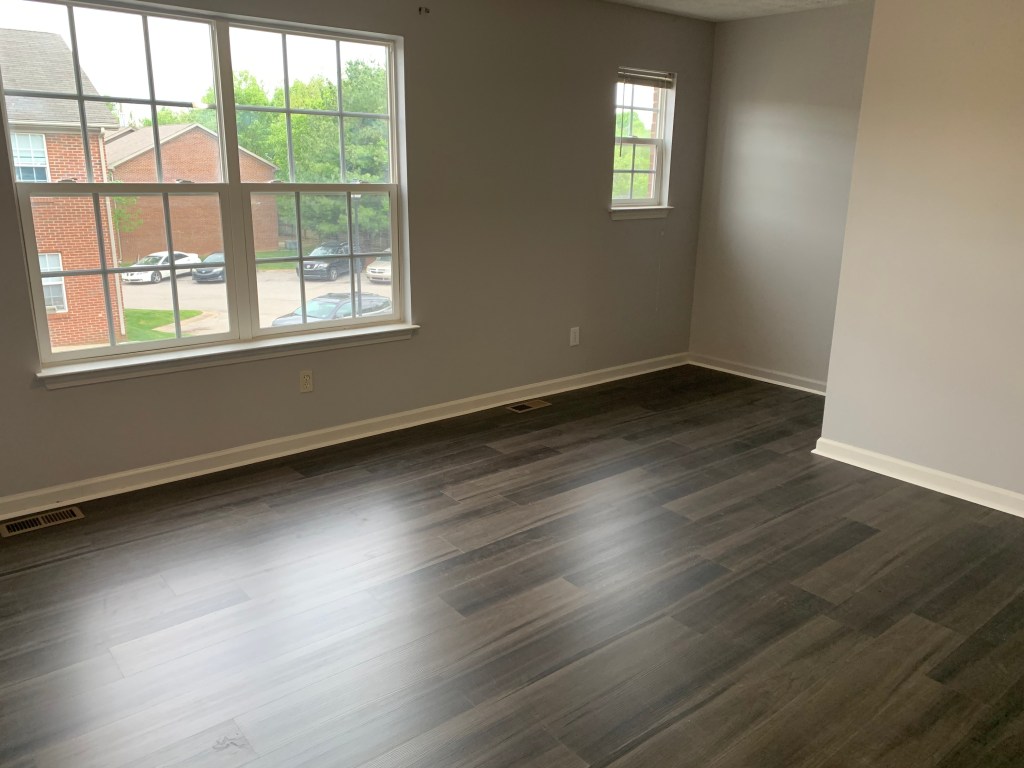
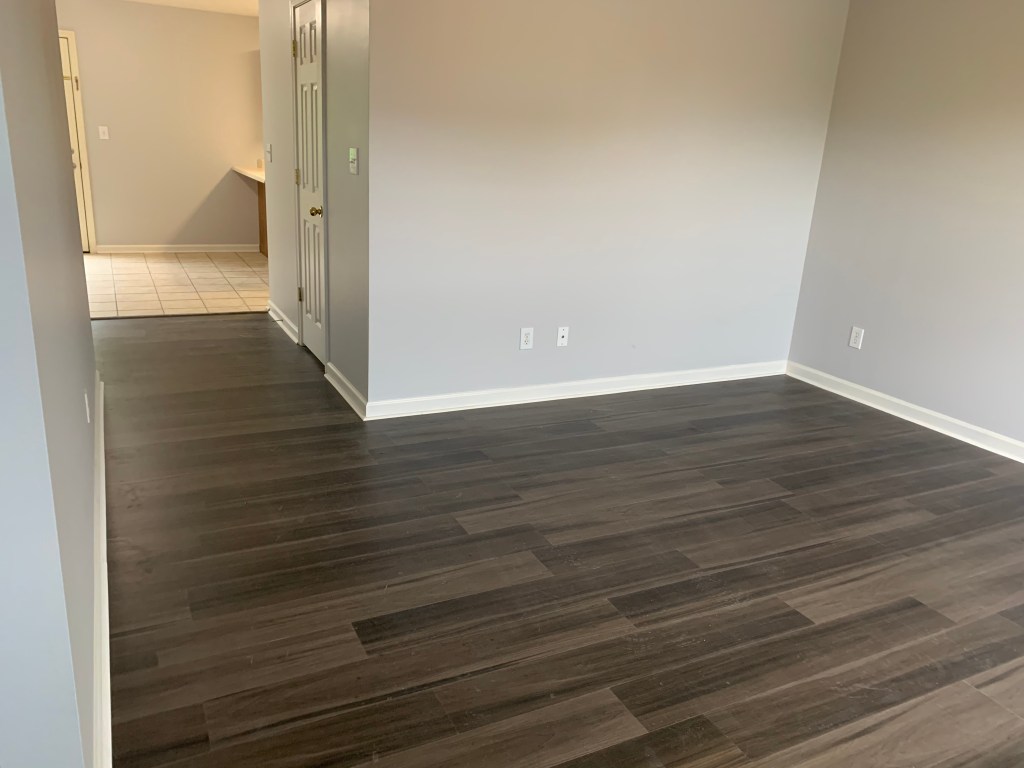
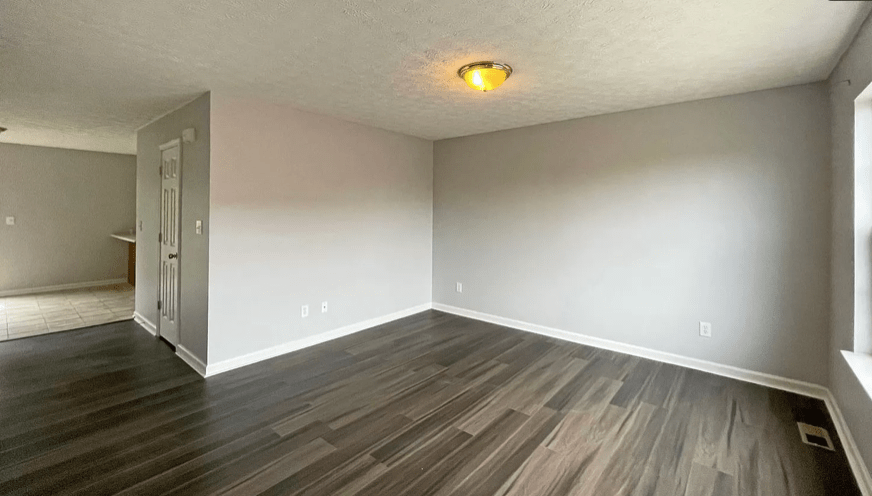
4) Instead of cleaning the main living area carpet, I wanted to replace it with hard surface flooring. We’ve had this house, with the same carpet, since 2016. That’s 6 years of carpeting that has been beat up (understatement) by 3 different tenants. The carpet could even be older than that because it’s what we inherited when we purchased the property. I explained in a recent post all the reasons why we laid LVP and how we accomplished it ourselves.
COSTS OF TURNOVER
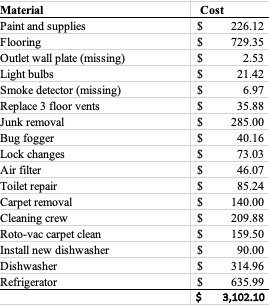
I had to supply my property manager with specific costs associated with the work I did, so here’s that, along with the charges they had on our account. Not all of this gets billed to the tenant. For example, the dishwasher and refrigerator were at its useful life and needed replacement, due to no fault of the tenant’s.
While it was hard to get started, seeing the mountain in front of me when I first walked into this house, I do appreciate having done most of the work myself. We spent over 28 hours at the house. I did about half of that by myself. Mr. ODA and his dad helped get some progress on the painting one day, and then Mr. ODA and I worked together on the flooring.
We also have the months of lost rent that were unexpected. With notice, we could have listed and shown the house before the current tenant vacated. We were caught on our heels, and we lost 2 full months of rent. Unfortunately, we truly lost 18 days of progress in those 2 months because our property manager didn’t enter the house to confirm abandonment timely.
LIGHT AT THE END OF THE TUNNEL
We ended up listing the house on May 6th. They had several showings, but the layout is hard to get rented. One couple submitted an application on a Thursday. When our property manager reached out to them, they never responded. Our property manager had pushed to list the house at $1250. Once that couple ghosted us, I told her to lower it to $1200. Just as I was about to give up and have it lowered, she was able to get another application and a signed lease. Luckily, being that it was May 25th, these people wanted a June 1st rental. We increased our rent by $275/month and only lost 2 months of rent, which is mostly made up by the drastic increase in rental income.
Another silver lining is that we paid off this property’s mortgage multiple years ago. Therefore, we didn’t have the extra “bleeding” of money by having to make two mortgage payments without having the cashflow to offset it.
We don’t expect to see a dime from the old tenant of what we spent to turnover the unit. We didn’t have any issues with him while he lived there, and his abandonment and lack of communication was surprising. Someone who leaves like that, and leaves the house in such poor condition, isn’t going to put forth effort to pay a $3k bill he receives in the mail. It’s in the hands of our property manager at this point and will likely move to collections. We’re just happy to have new renters in the unit and have this one behind us.